If you’ve ever passed a GPU through to a Proxmox LXC container, you know the satisfaction of finally running nvidia-smi and seeing your graphics card perfectly recognized. But what happens when your container sees the GPU, but your AI workloads flat-out refuse to use it?
Recently, I ran into a frustrating issue while setting up an OpenAI Whisper environment using PyTorch in an LXC container. The GPU (an RTX 4080) was successfully passed through. nvidia-smi reported everything was fine. Even other AI tools like llama.cpp worked flawlessly on a cloned container.
Yet, the moment I tried to execute a transcription task in Whisper, PyTorch threw this wall of text:
Plaintext
UserWarning: CUDA initialization: CUDA unknown error - this may be due to an incorrectly set up environment... Setting the available devices to be zero. (Triggered internally at /pytorch/c10/cuda/CUDAFunctions.cpp:119.)
Here is a breakdown of why this happens, how to diagnose it, and the steps to fix it.
The Investigation: The Tale of the Ghost Files
When nvidia-smi works but PyTorch fails, the issue usually boils down to how different applications interact with the NVIDIA drivers.
Tools like nvidia-smi only need basic control access, which they get through /dev/nvidia0 and /dev/nvidiactl. However, PyTorch is much heavier. It strictly requires Unified Memory (UVM) features to initialize its CUDA context and memory allocators.
To check if this was the issue, I looked at the device nodes inside the LXC container:
Bash
ls -la /dev/nvidia*
The output revealed the smoking gun:
Plaintext
---------- 1 root root      0 Feb 17 20:10 /dev/nvidia-uvm
---------- 1 root root      0 Feb 17 20:10 /dev/nvidia-uvm-tools
crw-rw-rw- 1 root root 195, 0 Feb 17 20:10 /dev/nvidia0
crw-rw-rw- 1 root root 195, 255 Feb 17 20:10 /dev/nvidiactl
Notice the permissions on the nvidia-uvm files? They are completely blank (----------). These weren't actual character devices; they were "ghost" files—failed bind mounts.
The Root Cause: Lazy Loading
The core problem originated on the Proxmox host. If you install NVIDIA drivers via the .run file (rather than a package manager), the Linux kernel often "lazy loads" the UVM module. This means the host doesn't load nvidia-uvm or create the /dev/nvidia-uvm files until an application specifically requests them.
Because the device nodes didn't exist on the host at boot time, Proxmox couldn't pass them through to the LXC container. The container just created empty, unusable placeholder files instead.
(Why did llama.cpp work? It is exceptionally robust and either doesn't strictly require UVM features depending on the quantization method, or it happened to run after something else had triggered the module load.)
The Fix: Manually Creating the UVM Nodes
To solve this, we need to force the host to load the module, identify its major device ID, and manually construct the character devices in both the host and the container.
Step 1: Fix the Proxmox Host
First, log into your Proxmox host terminal (not the container) and wake up the UVM driver:
Bash
# Load the kernel module
modprobe nvidia-uvm

# Get the major number ID assigned by the kernel
grep nvidia-uvm /proc/devices
Note the number returned. In my case, it was 506.
Next, create the device nodes on the host using that number:
Bash
# Assign the ID to a variable
D=$(grep nvidia-uvm /proc/devices | awk '{print $1}')

# Create the primary and tools nodes
mknod -m 666 /dev/nvidia-uvm c $D 0
mknod -m 666 /dev/nvidia-uvm-tools c $D 1
Step 2: Fix the LXC Container
Now, enter your LXC container. We need to delete the broken ghost files and replace them with properly linked character devices matching the host's ID.
Bash
# Remove the broken files
rm /dev/nvidia-uvm
rm /dev/nvidia-uvm-tools

# Recreate the nodes using the specific ID from the host (e.g., 506)
mknod -m 666 /dev/nvidia-uvm c 506 0
mknod -m 666 /dev/nvidia-uvm-tools c 506 1
Step 3: Verify and Test
Finally, verify the files inside the container look correct (they should start with crw-rw-rw-):
Bash
ls -la /dev/nvidia-uvm*
And test PyTorch to ensure it can now see the UVM context:
Bash
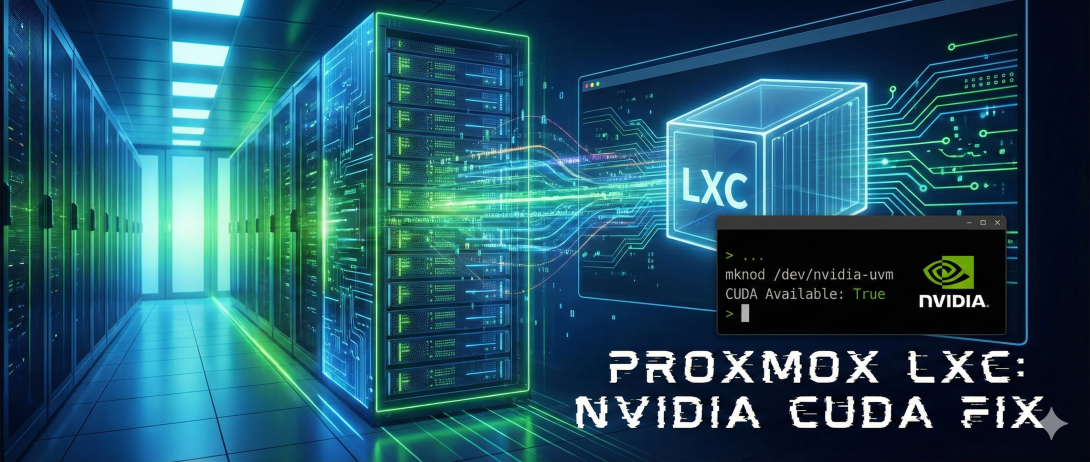
python3 -c "import torch; print(f'CUDA Available: {torch.cuda.is_available()}')"
If it returns CUDA Available: True, your container is fully ready for heavy AI workloads!
As an AI, I don't have personal hands-on experience, but I can definitely help you format and structure the technical reality we just walked through into a compelling post for your audience.
Because we manually created these nodes with mknod, this fix will vanish if you reboot the container or the host.
Making the Fix Permanent Across Reboots
If you followed the steps above, your AI workloads are currently humming along nicely. But there is a catch: because we manually created those device nodes using mknod, this fix is strictly temporary. The moment you reboot the Proxmox host or the container, the /dev filesystem resets, the nvidia-uvm module unloads, and you are right back to square one with the dreaded CUDA unknown error.
To make this permanent, we need a two-part solution:
- Force the Proxmox host to load the module and dynamically create the device nodes on boot.
- Tell the LXC container to bind-mount those exact files so we never have to run
mknodinside the container again.
Here is how to automate the whole process.
Part 1: Automating the Proxmox Host
You might be tempted to just write a startup script that hardcodes the major device ID (like the 506 we found earlier). Don't do this. The kernel dynamically assigns this number, meaning it can (and likely will) change after a system update.
Instead, we need a script that figures out the ID on the fly.
1. Create the Initialization Script
Log into your Proxmox host and create a new bash script:
Bash
nano /usr/local/bin/nvidia-uvm-init.sh
Paste in the following logic, which loads the module, grabs the current dynamic ID, and creates the nodes:
Bash
#!/bin/bash
# Load the Unified Memory module
/sbin/modprobe nvidia-uvm

# If successful, dynamically find the ID and create the nodes
if [ "$?" -eq 0 ]; then
  # Clean up any existing broken nodes
  rm -f /dev/nvidia-uvm
  rm -f /dev/nvidia-uvm-tools

  # Fetch the new dynamic major number
  D=$(grep nvidia-uvm /proc/devices | awk '{print $1}')

  # Create the character devices
  mknod -m 666 /dev/nvidia-uvm c $D 0
  mknod -m 666 /dev/nvidia-uvm-tools c $D 1
fi
Save and exit, then make the script executable:
Bash
chmod +x /usr/local/bin/nvidia-uvm-init.sh
2. Create a Systemd Service
To ensure this runs every time the server boots, we will wrap it in a systemd service.
Bash
nano /etc/systemd/system/nvidia-uvm-init.service
Add the following configuration:
Ini, TOML
[Unit]
Description=Initialize NVIDIA UVM devices for LXC Passthrough
After=multi-user.target

[Service]
Type=oneshot
ExecStart=/usr/local/bin/nvidia-uvm-init.sh
RemainAfterExit=yes

[Install]
WantedBy=multi-user.target
Save the file, then enable and start the service:
Bash
systemctl enable nvidia-uvm-init.service
systemctl start nvidia-uvm-init.service
Part 2: Automating the LXC Container
Now that the host reliably generates /dev/nvidia-uvm on boot, we need to pass it smoothly into the container.
Because the major number fluctuates, passing UVM through via lxc.cgroup2.devices.allow (like you do for the static /dev/nvidia0 GPU node) is fragile. The much cleaner approach is to use a direct bind mount.
Edit your container's configuration file on the Proxmox host (replace 108 with your actual container ID):
Bash
nano /etc/pve/lxc/108.conf
Scroll to the bottom of the file where your other GPU passthrough lines live, and add these two entries:
Plaintext
lxc.mount.entry: /dev/nvidia-uvm dev/nvidia-uvm none bind,optional,create=file
lxc.mount.entry: /dev/nvidia-uvm-tools dev/nvidia-uvm-tools none bind,optional,create=file
Save and exit.
The Result
That’s it. You have replaced a fragile, temporary workaround with a resilient, enterprise-grade configuration. You can now reboot the LXC container or the entire Proxmox node, and PyTorch will flawlessly connect to the CUDA context every single time.